How to Create an Object Flow Application in Isarsoft Perception
Learn how to create an Object Flow application in Isarsoft Perception and add lines and zones to it.
Published
December 21, 2022
.avif)
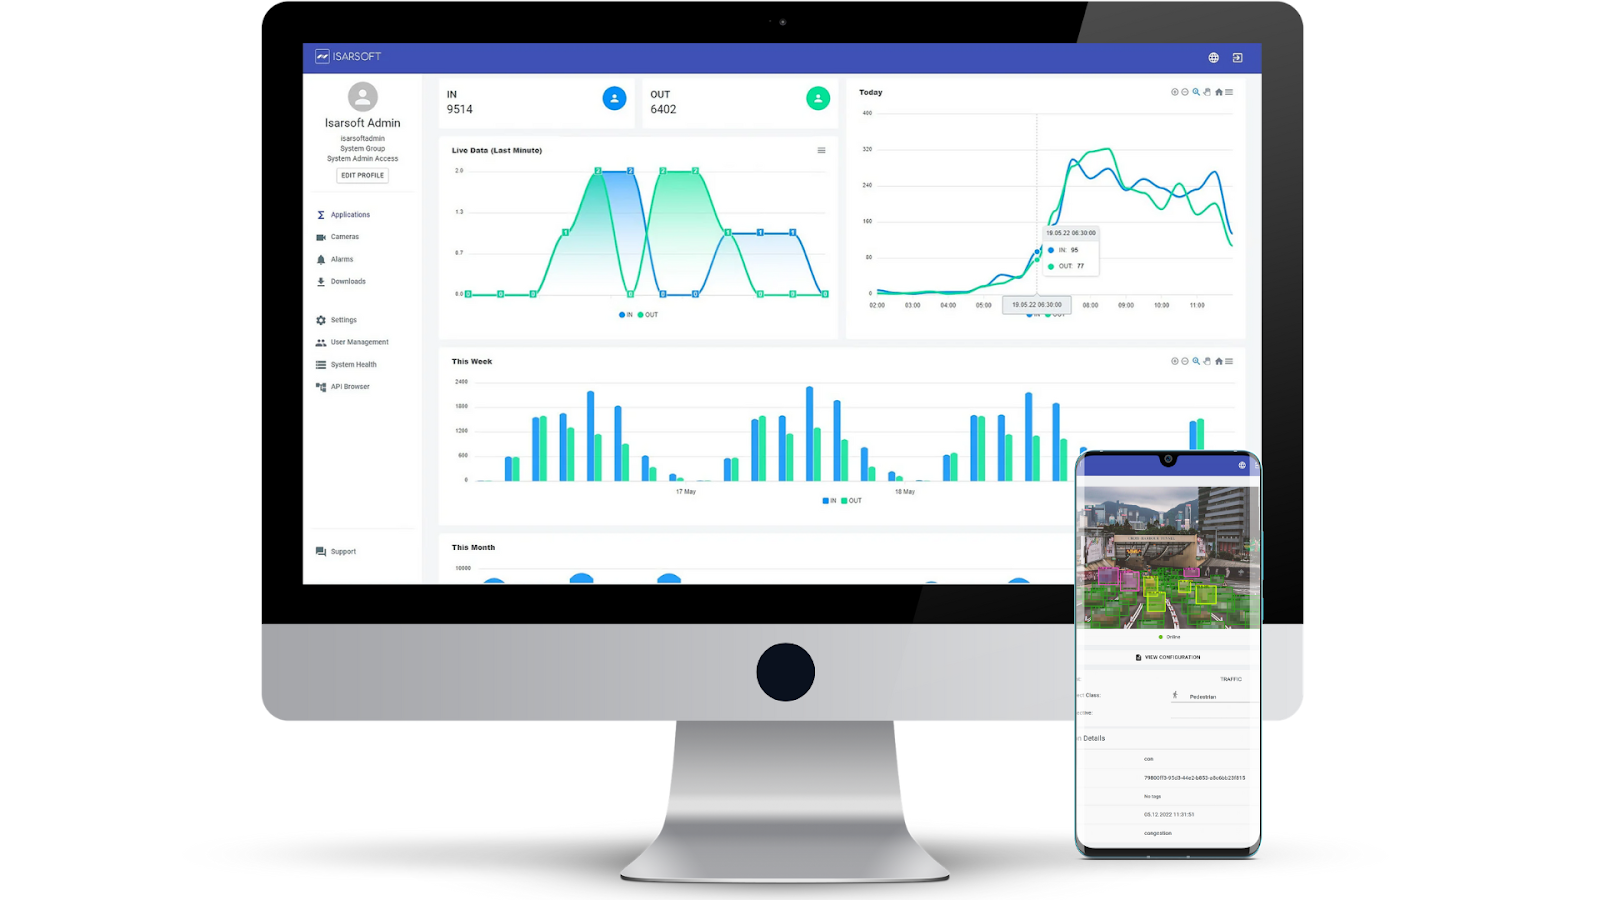
Applications are the central component of Isarsoft Perception, as this is where video streams are converted into metadata.
This post will guide you step by step through the whole process of creating the Application and explains how you can create a zone or line.
Application Overview
Click on the first column of the side bar on the left, the Application Overview opens. Then click on the blue button "CREATE APPLICATION" at the top right.

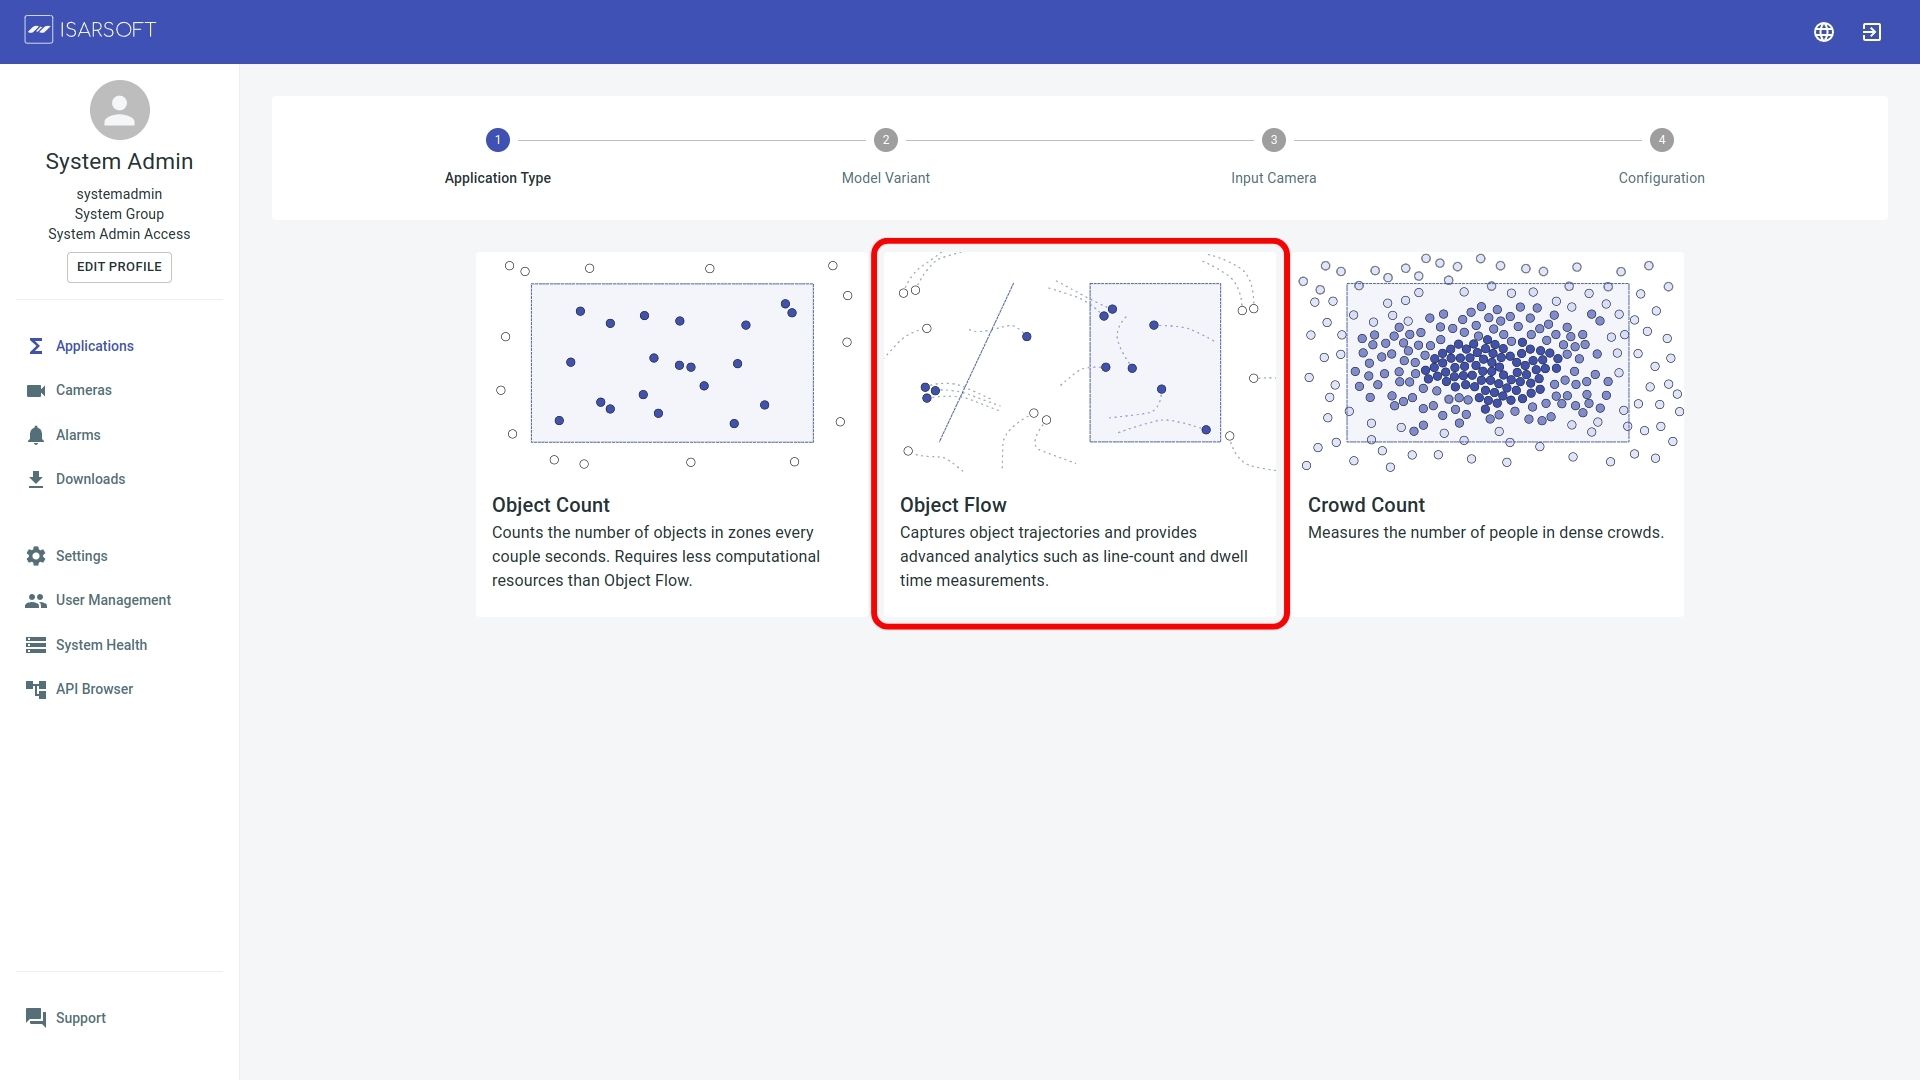
Application Type
In the following step are three different Types available but you have to choose the Object Flow variant. This Application Type is the only one which offers different Visualizations and it offers all "Model Variants".
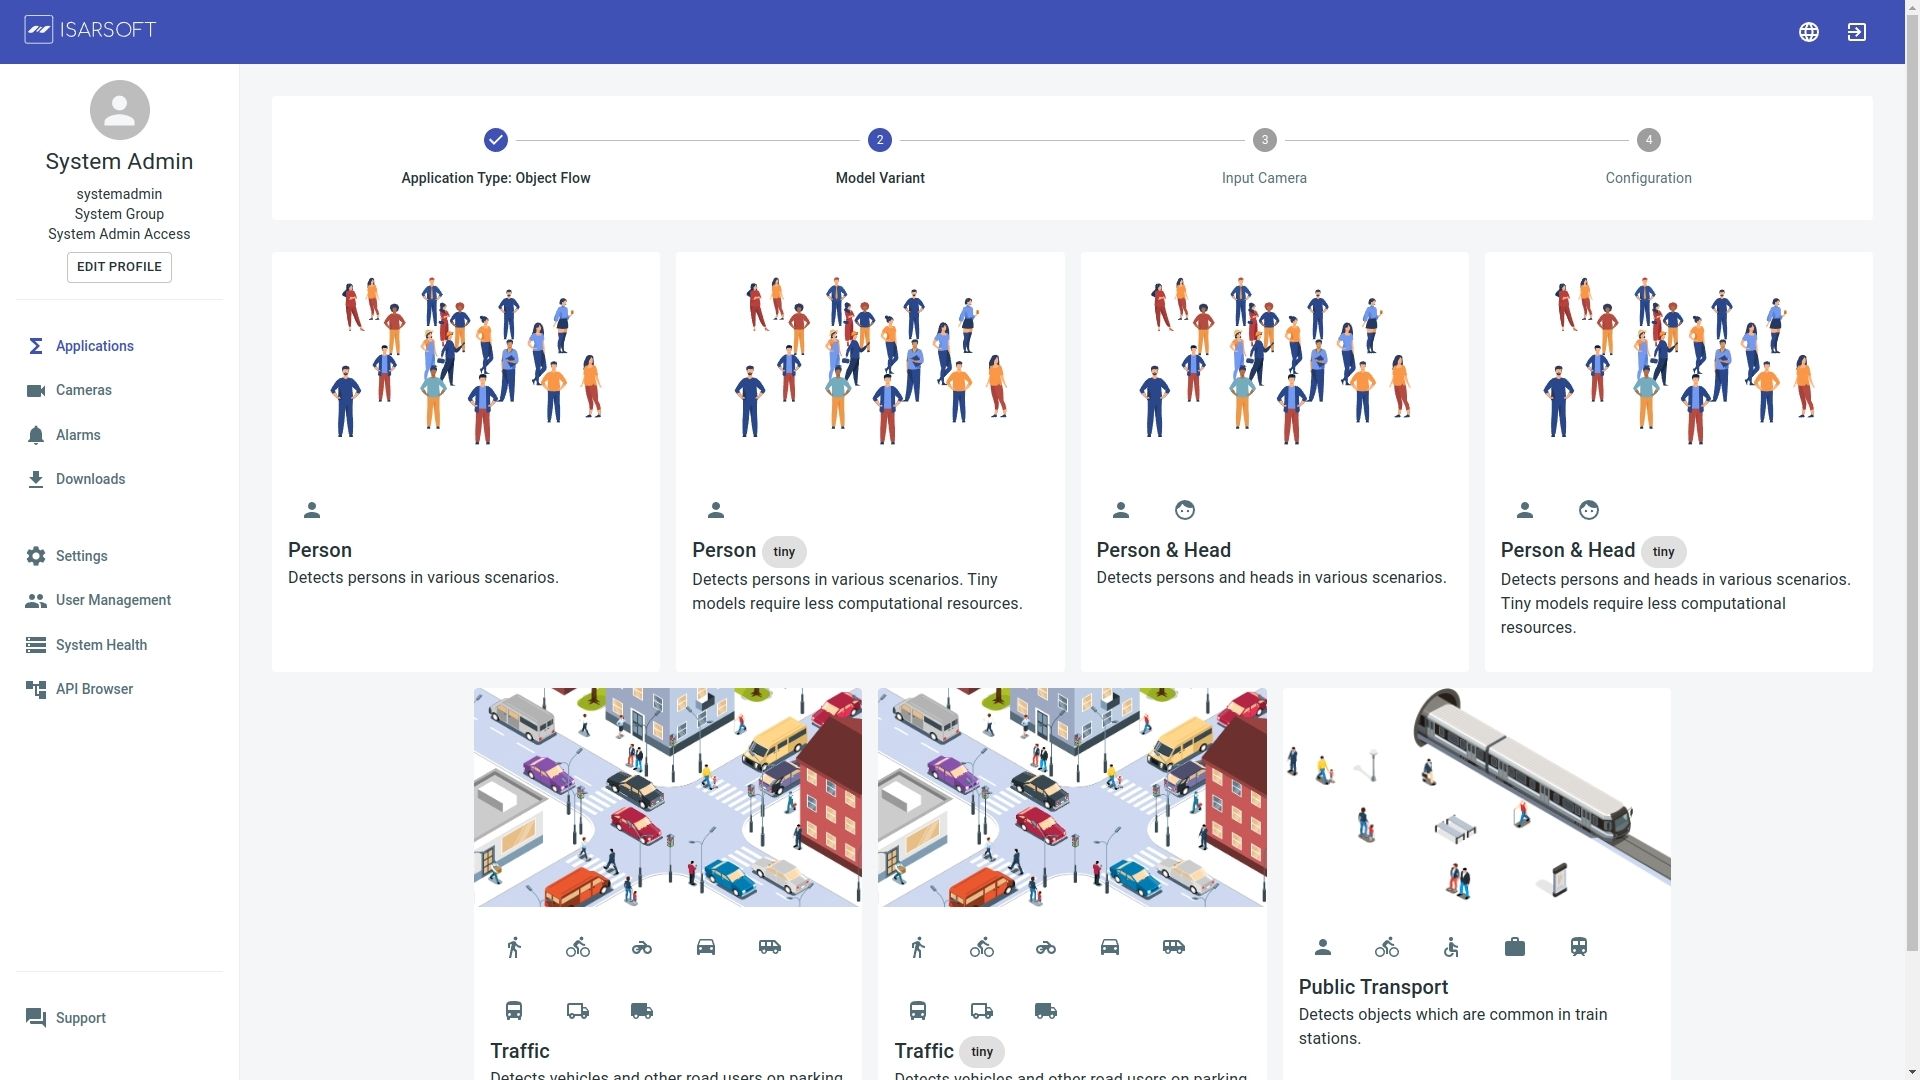
Model Variant
There are different options you can use, the basic model for person recognition is the Person model. In comparison, the tiny version requires fewer computing resources and may be less precise, especially over longer distances. Which Variant works best for depends on your facility and the recording cameras.
Camera Selection
After you finished the last steps you can select the camera you want to create an Application for. The camera has to be created before creating an Application, read our Blogpost about the creation process to learn more.

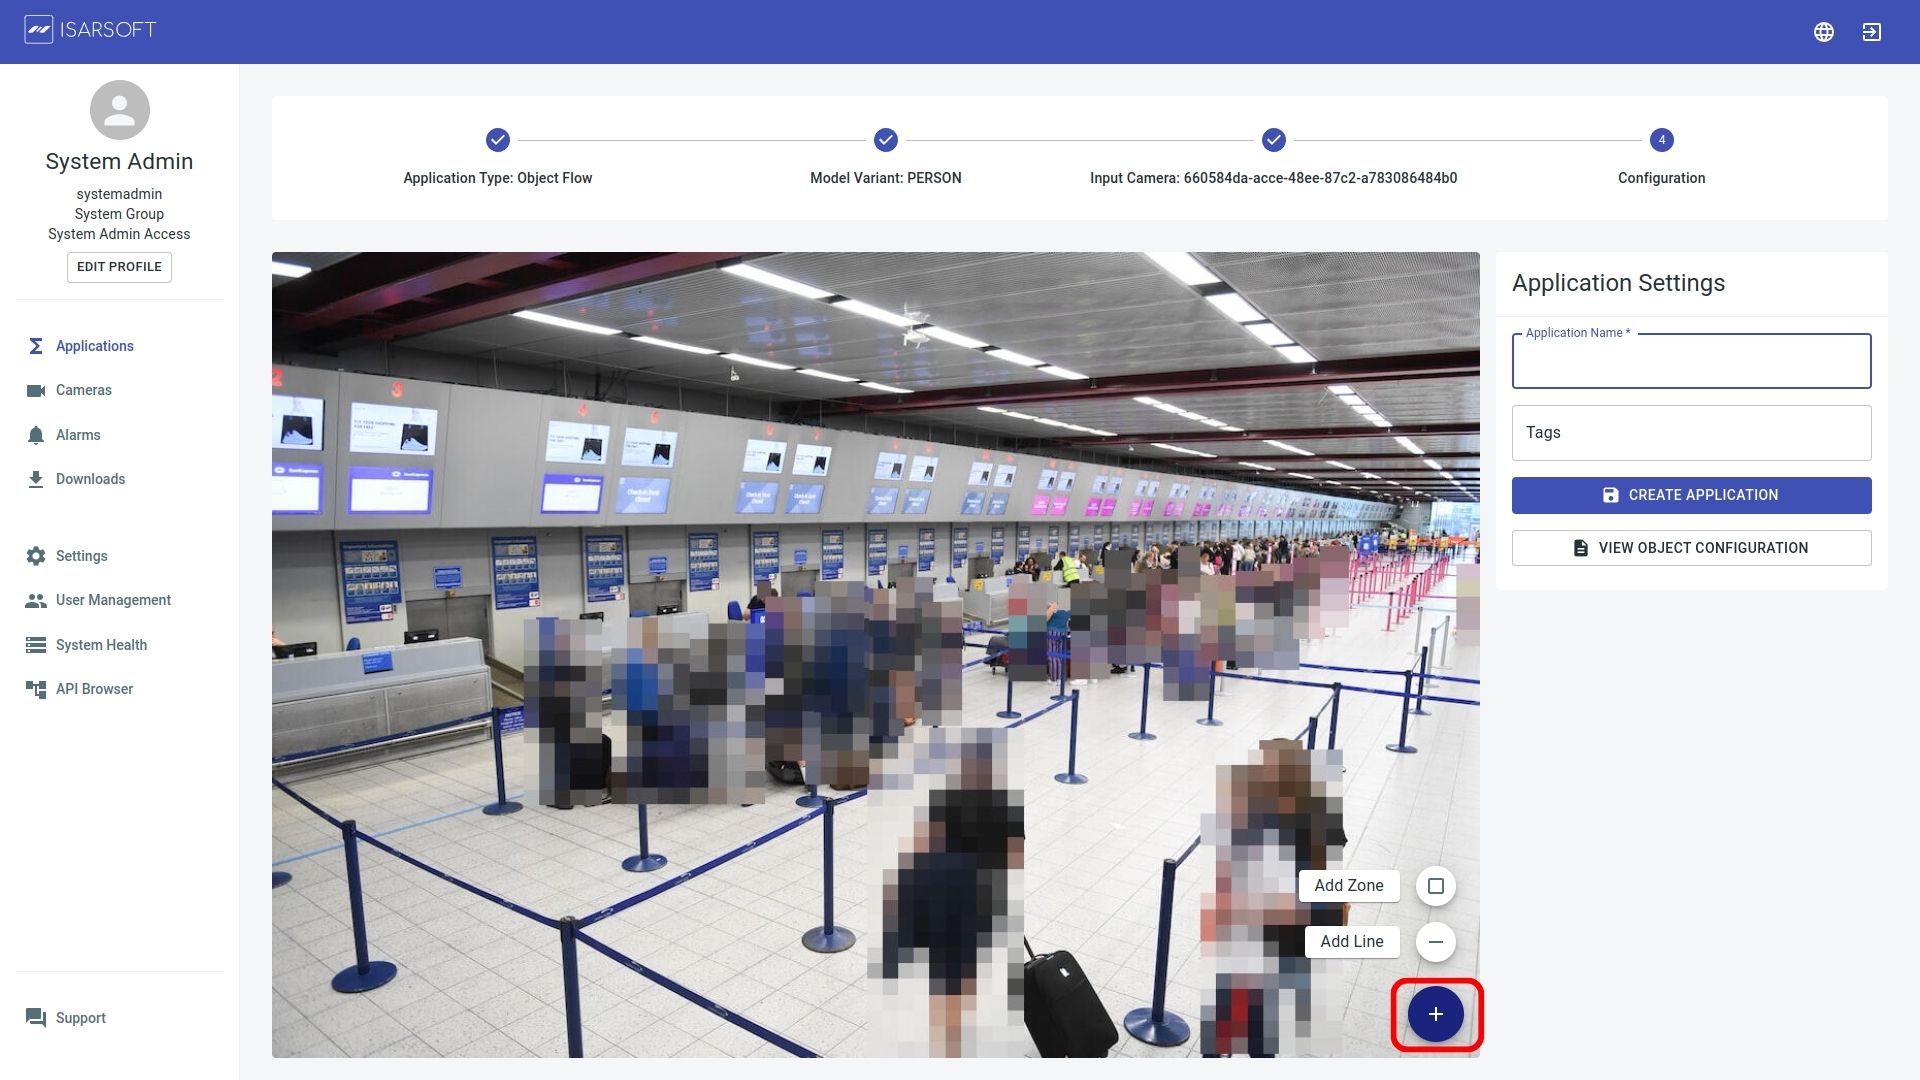
Configuration
Name the Application and create a new tag (press enter, after naming the tag to create it) or select a existing one. Tags are not necessary but are a central component to make it easier to find an Application. For example, different cameras can be placed at the entrances of a building to be provided with the common tag entrance .The overview can be filtered by the corresponding tag, so that only the cameras at the entrances are displayed.

How to create a Zone
To create a Zone hover over the blue round button with the plus in the right bottom corner of your camera view and click on Add Zone. Name the Zone and give it a Tag and press the blue ADD ZONE button. A grey square shaped box appears in the middle of your camera view. Grab the corners and move it to the position you want. You can add more corners by making a right click on the boundary box and also can delete and edit the Zone. Move the box as you need it by grabbing and pulling the corners.
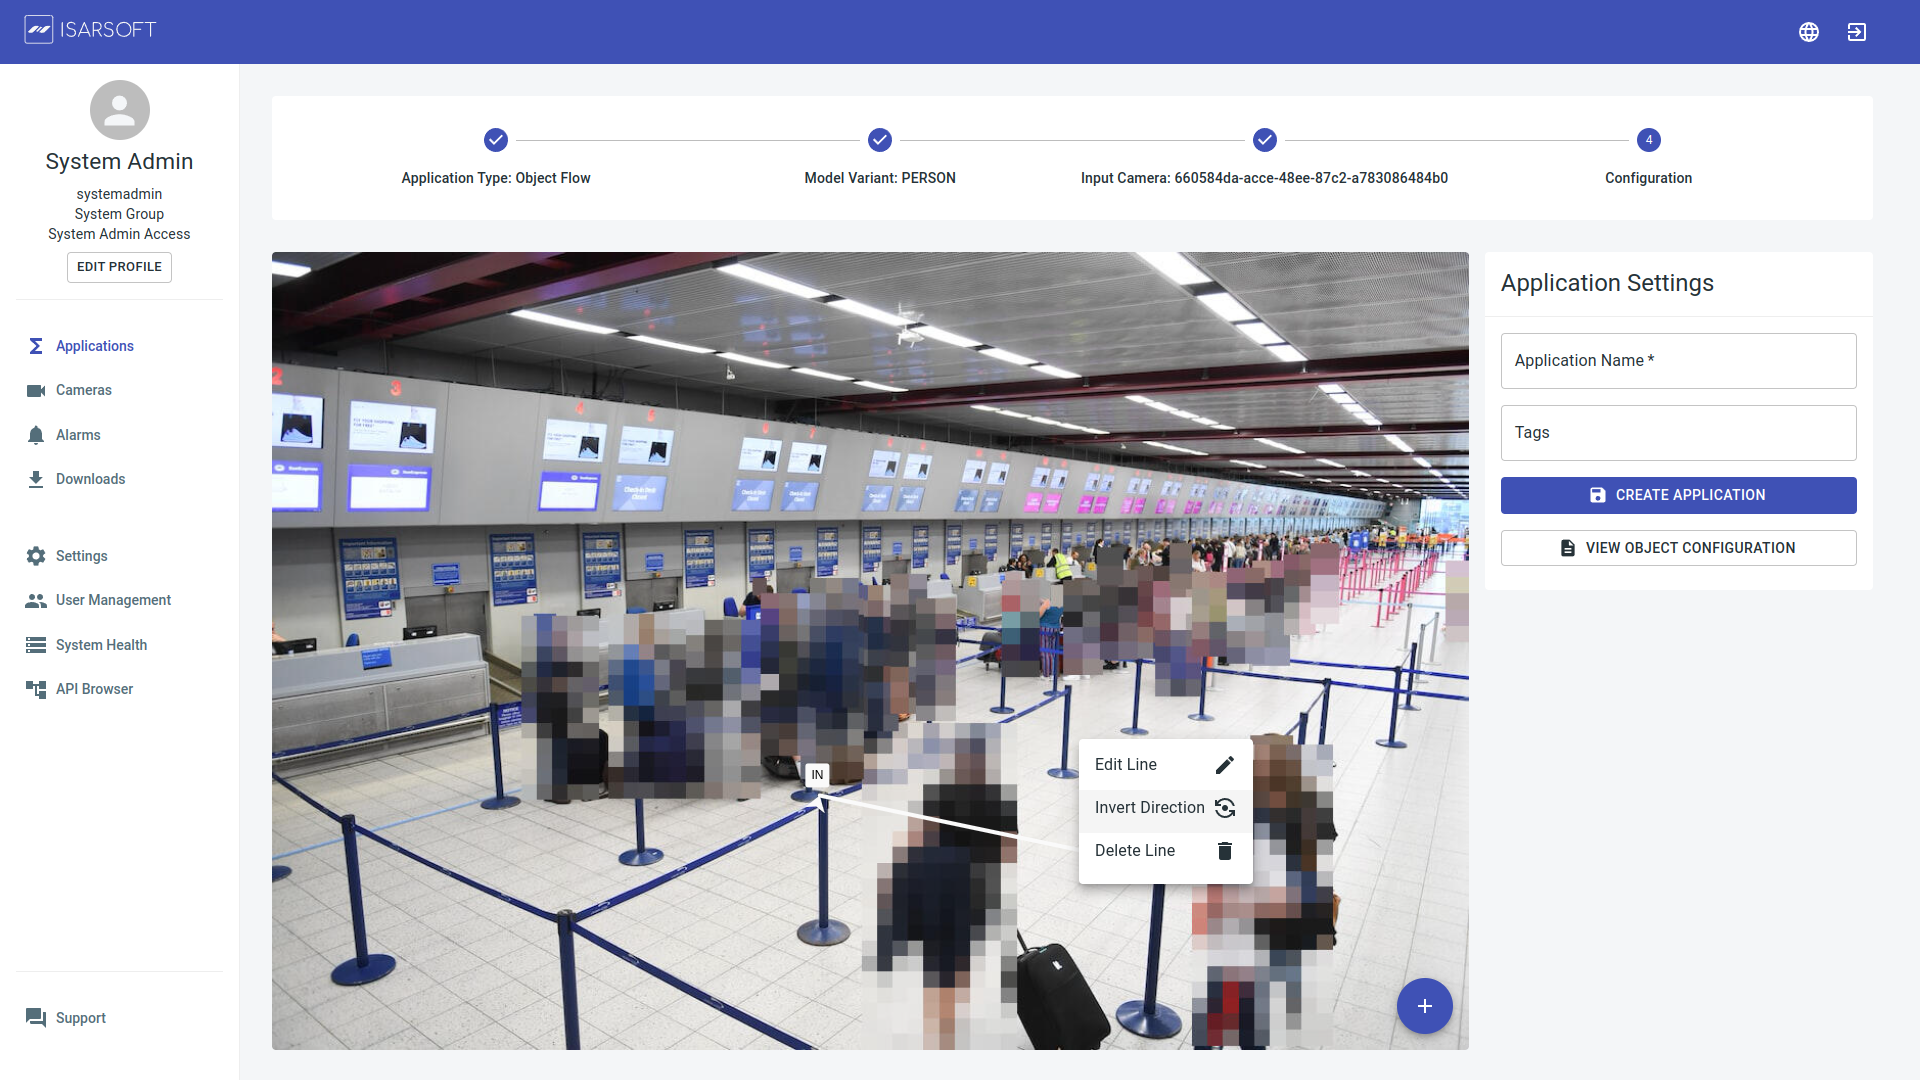
How to create a line
To draw a Line hover over the blue round button with the plus in the right button corner of your camera view and click on Add Line. Name the Line and give it a Tag and press the blue ADD Line button. By doing the right click on the linen you can invert the directions, that means IN and OUT of your live counts is reverse but you can also delete and edit your line by doing the right click.
More about Isarsoft
With Isarsoft Perception, your camera systems become part of your business intelligence. Whether the goal is to increase efficiency, customer satisfaction or safety, Isarsoft Perception provides the insights needed for informed decisions.
Contact us, to learn more about how to turn security cameras into intelligent sensors.
Explore More Publications
.avif)
Video Analytics or Sensors? Finding the best People Counting Tech for your Business
Do you want to improve your business by adopting a people counting solution but feel overwhelmed by the options? With video analytics and sensor-based technologies offering different advantages, choosing the right system can be challenging.
.png)
Who are your customers? Detection of age, gender, and group size in retail
Retail stores are often a blackbox when it comes to customer demographics. When POS checkout systems and customer loyalty programs do only reveal a part of the story, video analytics can now cluster store visitors in age groups and match them to male and female gender.
.avif)
How to: Customer Journey Analysis with Re-ID in Retail
Customer journey analysis with Re-ID provides the retail industry with precise data on footfall, customer behavior, and space utilization. Based on these insights, retailers can make smart decisions for both marketing and operations.